To Edit Profile
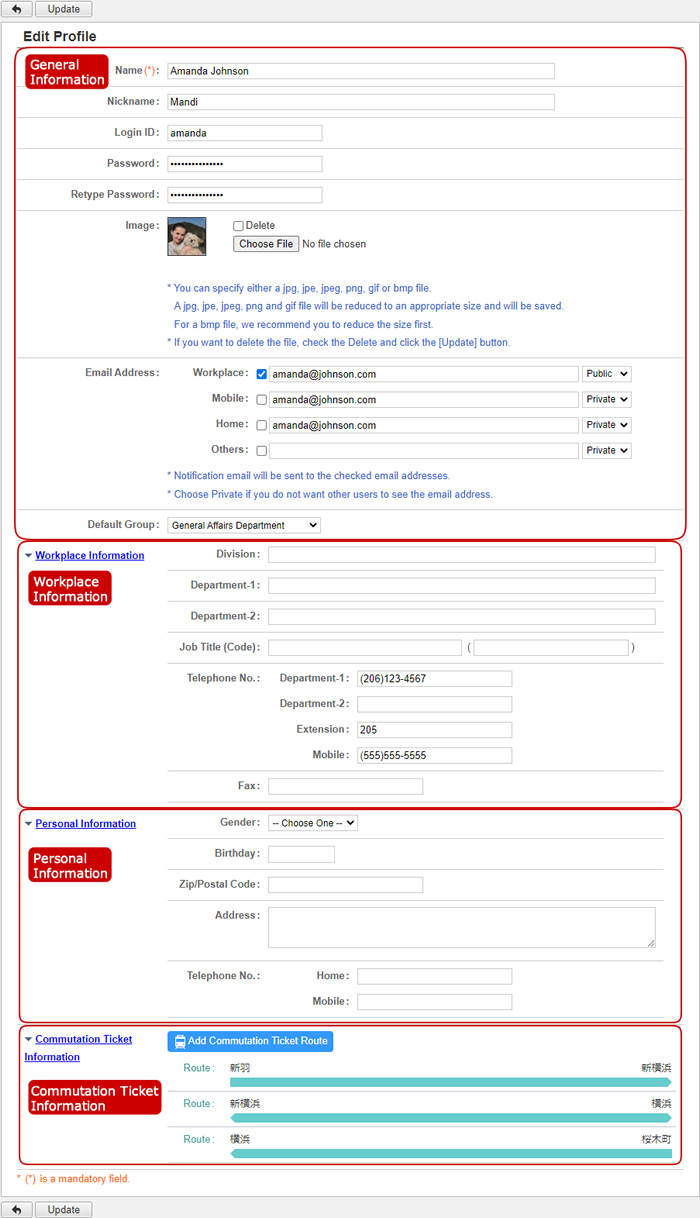
When you press the link of Profile in Settings menu, Edit Profile screen is displayed.
Enter your login information, workplace and personal information.
The information you entered can be viewed by User Directory application.
* You may not change some fields if your administrator make them non editable.
 General Information
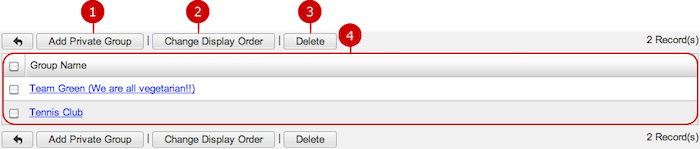
-
Enter a name.
-
Enter a nickname.
-
Enter a login ID.
* You have to enter this information when the login option is set to "By Entering User ID and Password".
-
Enter a login password.
* If you do not set a password, the user does not have to enter a password when login.
* Users cannot input a password that does not meet password policy if it is set by an administrator. Input any password that meets the requirement.
-
Enter the same password you entered again to confirm the password.
-
Choose an image file.
* If you want to delete the file, check the Delete and click the [Update] button.
The image is used in Neotwi, Discussion, posts of Project Management, Profile screen, Portal, Web Conference, Presence and SmartViewer.
-
Enter an email address.
Enter an email address each of "Workplace", "Mobile", "Home", "Other".
* Notification email will be sent to checked email addresses.
* Choose Private if you do not want other users to see the email address.
-
Set the default group.
Choose a group which is initially used to display lists in each application.
Workplace Information
-
Enter a division.
-
Enter a department.
-
Enter a department (2).
-
Enter a job title and its code.
The job title code is used to sort the data by the code.
-
Enter telephone Nos.
Enter a telephone No., each of department, another department, extension, mobile.
-
Enter a Fax number.
Personal Information
-
Choose a gender.
-
Enter a birthday.
-
Enter a ZIP/Postal code.
-
Enter an address.
-
Enter a home and mobile telephone number.
Season Ticket InformationThis section appears when the Transportation/Expense features are enabled by the system administrator.
(For more information, please refer to
Transportation/Expenses > Related Settings > To Setup Season Ticket Information in User's Manual)
Click "Update" button to save the changes.
To Display List of Private Groups
When you press the link of Private Group Settings in Settings menu, Private Group Settings screen is displayed.
Private groups you created can be shared by each application.
To Add Private Group
When you press "Add Private Group" button, Add Private Group screen is displayed.
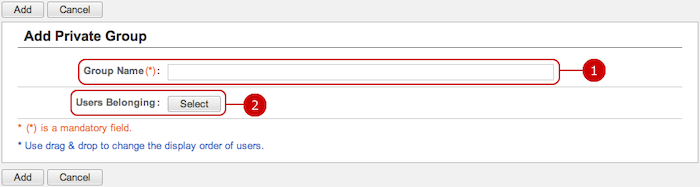
Click "Add" button to save and add the data.
To Edit Private Group
When you press a link of Group Name, Edit Private Group screen is displayed.
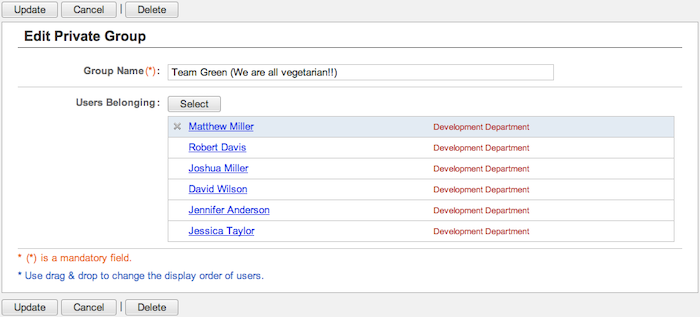
Click "Update" button to save the changes.
To Delete Private Groups
When you press "Delete" button on Recipient Whitelist Settings screen or Update Recipient screen, a confirmation window appears.
When you press "Yes" in the delete confirmation windows, the private group is deleted. The deleted groups cannot be recovered. Please take note.
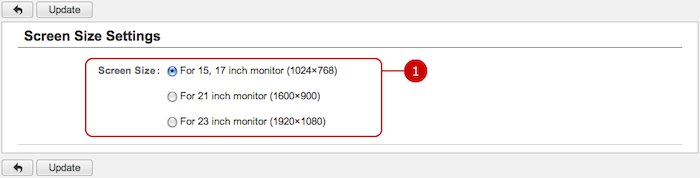
To Set Screen Size Settings
When you press the link of Screen Size Settings in Settings menu, Screen Size Settings screen is displayed.
You can change the screen size to match the size of your monitor.
* You may not change some fields if your administrator make them non editable.
-
Choose a size.
The screen is switched to the size you selected.
When the setup is complete, press "Update" button to save the data.
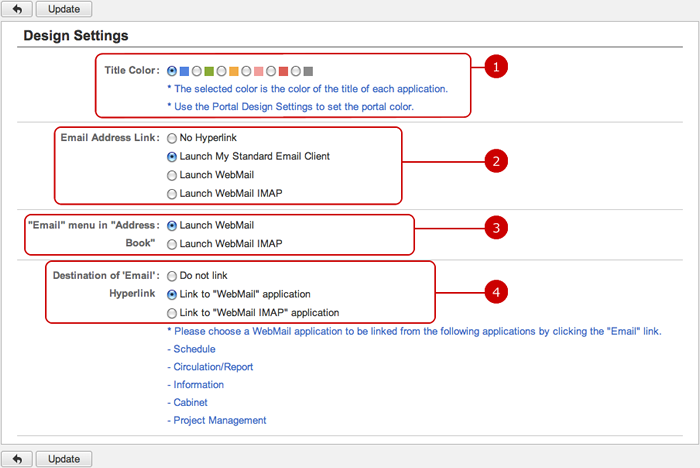
To Set Design Settings
When you press the link of Design Settings in Settings menu, Design Settings screen is displayed.
* You may not change some fields if your administrator make them non editable.
-
Choose a color for the title.
The color you selected is the basic color of the title of each screen.
* Use the Portal Design Settings to set the portal color.
-
Choose where email addresses on screen link to.
If "No Hyperlink" is selected, email addresses doesn't convert into links.
If "Launch My Standard EMail Client" is selected, clicking a link of the email address opens the user's default email client.
If "Launch WebMail" is selected, clicking a link of the email address opens the message composing screen of the WebMail application.
If "Launch WebMail IMAP" is selected, clicking a link of the email address opens the message composing screen of WebMail IMAP application.
* If "Launch WebMail IMAP" is selected even though WebMail IMAP application is not enabled, the result is the same as "No Hyperlink".
Links to Email addresses appears on the following screens.
- Each user's profile dialog
- Lists of User Directory application
- Mailto links created by the rich text editor
- Email addresses in other applications
-
Choose which the "Email" link on the Address Book window links to.
Select whether to use "WebMail" or "WebMail IMAP" in Address Book application.
* If "WebMail IMAP" is selected even though WebMail IMAP application is not enabled, the result is the same as "WebMail".
-
Select a destination of "Email" link.
The destination of "Email" link will be used in the following functions:
- Schedule
- Circulation/Report
- Information
- Cabinet
- Project Management
If you choose "Do not link", "Email" link will not be displayed in each function.
If "Link to "WebMail" application" is selected, message composing screen of WebMail will be displayed when you click an "Email" link.
If "Link to "WebMail IMAP" application" is selected, message composing screen of WebMail IMAP will be displayed when you click an "Email" link.
* You cannot change a destination of "Email" link if administrator settings is set to not allow changes.
* "Launch WebMail" selection will not be displayed if WebMail function has been disable in administrator settings.
* "Launch WebMail IMAP" selection will not be displayed if WebMail IMAP function has been disable in administrator settings.
* "Launch WebMail" and "Launch WebMail IMAP" selections will not be displayed if WebMail and WebMail IMAP function has been disable in administrator settings.
When the setup is complete, press "Update" button to save the data.
To Set Basic Menu Settings
When you press the link of Menu Settings > Basic Menu Settings in Settings menu, Basic Menu Settings screen is displayed.
* You may not change some fields if your administrator make them non editable.
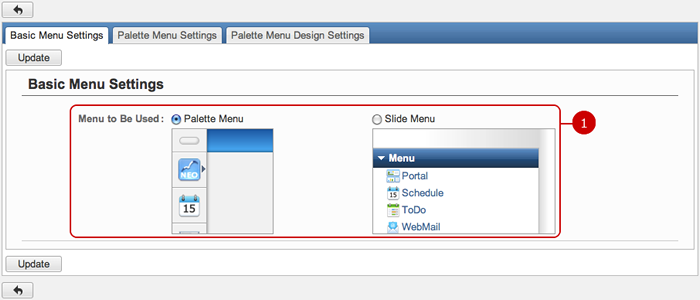
Click "Update" button to save the changes.
To Set Palette Menu Settings
When you press the link of Menu Settings > Palette Menu Settings in Settings menu, Palette Menu Settings screen is displayed.
* You may not change some fields if your administrator make them non editable.
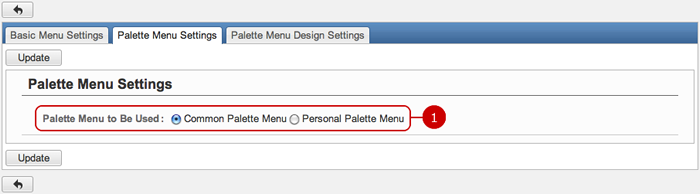
Click "Update" button to save the changes.
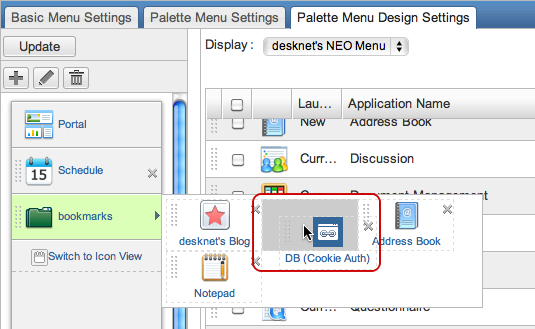
To Set Personal Palette Menu Settings
When you press the link of Menu Settings > Personal Palette Menu Settings in Settings menu, Personal Palette Menu Settings screen is displayed.
You can create the personal palette menu by selection and moving menu items to the area on the left.
* This guide describes based on desknet's NEO menu setting screen.
* You may not change some fields if your administrator make them non editable.
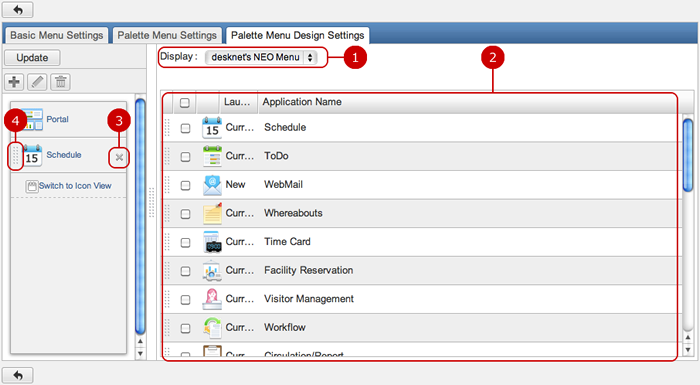
Click "Update" button to save the changes.
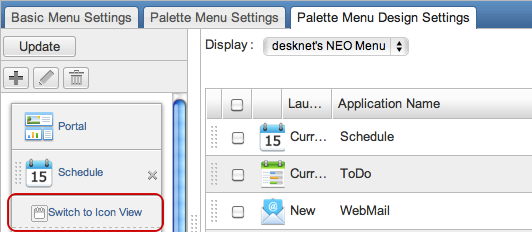
- Switch Palette Menu View
When you press "T" button, the palette menu is switched to display text and icons.
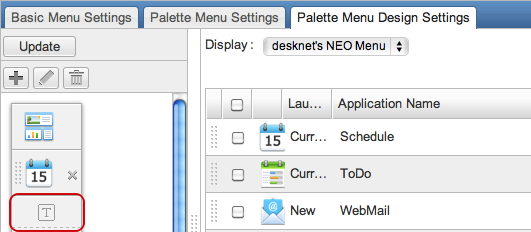
When you press "Switch to Icon View", the palette menu is switched to display icons.
To Manage Menu Groups
You can add, edit and delete menu groups to group menu items.
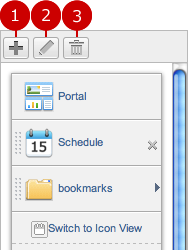
-
Add a new group.
When you press "Add Menu Group", a new window for the creation of group is displayed.
Enter a name of the group and choose an icon.
-
Edit a menu group name.
When you choose a group you want to change the name and press "Edit Menu Group" button, Edit Menu Group screen is displayed.
Enter a name of the menu group and save it.
-
Delete a menu group.
When you choose a menu group you want to delete and press "Delete Menu Group" button, the menu group is deleted.
* Press and hold down the mouse button over a menu item you want to move and move the mouse and release the mouse button on desired place to change the display order.
- To Move to Menu Group
When you are moving a menu item, if you release the mouse button over a menu group, the menu item is moved to the menu group.
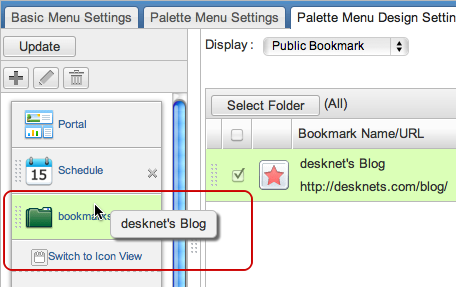
* If you choose a menu item from the list and release the mouse button over a menu group, the menu item is moved in the menu group.
Click "Update" button to save the changes.
To Edit Menu Items in Menu Group
When you press a menu group, menu items in the menu group are displayed.
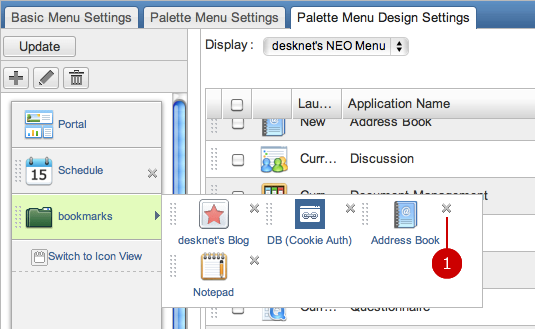
-
Delete a menu item from the group.
- To Change Display Order of Menu Items
Hold down the mouse button over the grip on the left side of a menu item and release the mouse button over desired place to change the display order.
Click "Update" button to save the changes.
ChatLuck Notification for Notification Addressed to You
Click ChatLuck Link Settings to open ChatLuck Link Settings screen.
By using this feature whenever a new notification arrives for you, the notification will also be sent to your My Room in ChatLuck.
* Menu is only displayed if its allowed by System administrators .
* This feature can be used only if you are using ChatLuck Single Sign-On, or your user information is synchronized with ChatLuck.
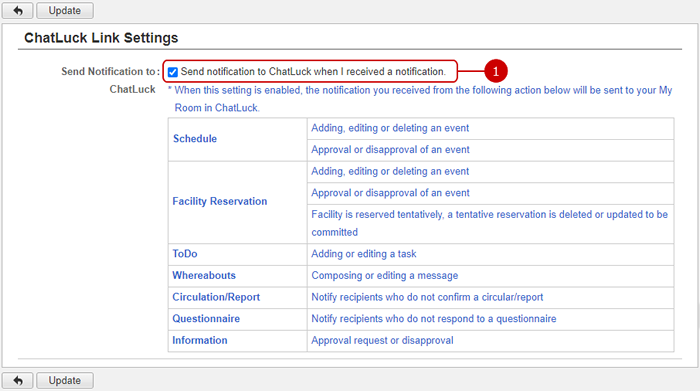
- Set whether to send notification to ChatLuck when you received a notification.
Click "Update" button to save the changes.
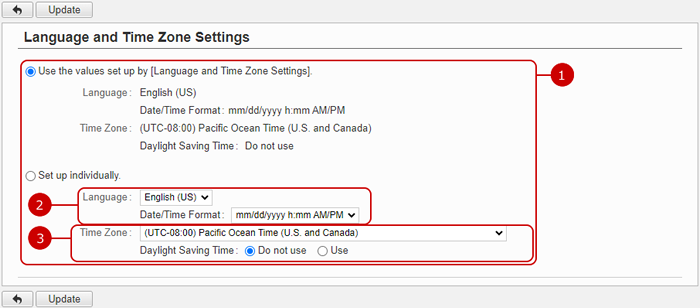
To Set Language and Time Zone Settings
When you press the link of Language and Time Zone Settings in Settings menu, Language and Time Zone Settings screen is displayed.
You can choose a language and time zone.
-
You can choose language and time zone setting from the following.
- Use the values set up by "Language and Time Zone Settings".
- Setup individually.
If you choose "Set up individually", choose a language, a date/time format, time zone and daylight saving time.
-
Choose a language and a date/time format.
The screens will be displayed in the language and the date/time format you selected.
* You will receive email announcements in English if you did not select Japanese.
-
Choose a time zone and daylight saving time.
Please change daylight saving time option manually.
* Every email announcement shows dates depending on your setting of time zone.
* The sender's time zone is displayed on the top of email announcements if the sender's time zone differs from the recipient's one because the email message may have recipients all over the world.
For example, this message will be added to the top of a message: (The date and time described in the following content are represented in UTC+09:00 AM.)
Click "Update" button to save the changes.
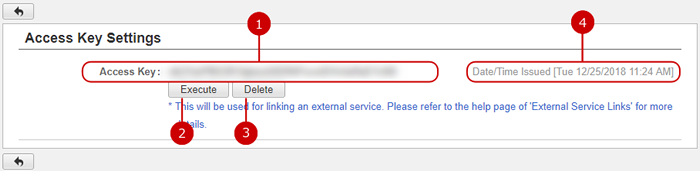
To Setup Access Key
Click "Access Key Settings" of User Settings Menu and go to Access Key Settings screen.
Checking, issuing and deletion of the Access Key used in External Service Links can be done.
*Menu is only displayed if Access Key Usage is allowed by System administrators .
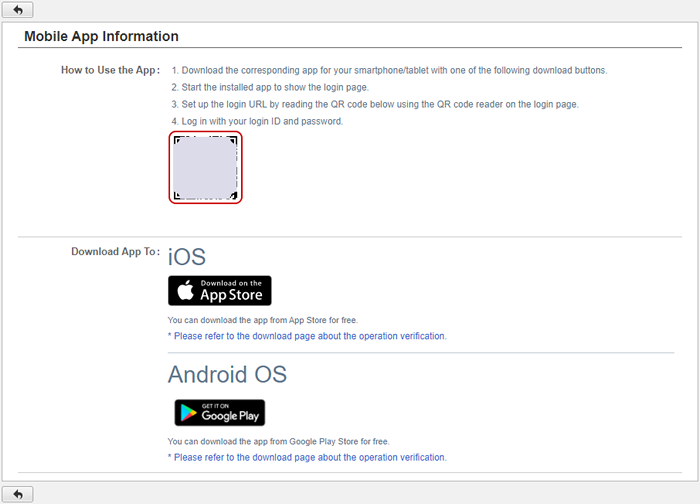
Confirm the Mobile App Information
Click the link of Mobile App Information in the settings menu to see the information about the mobile app.
You can set up the login URL and open the mobile app download page.
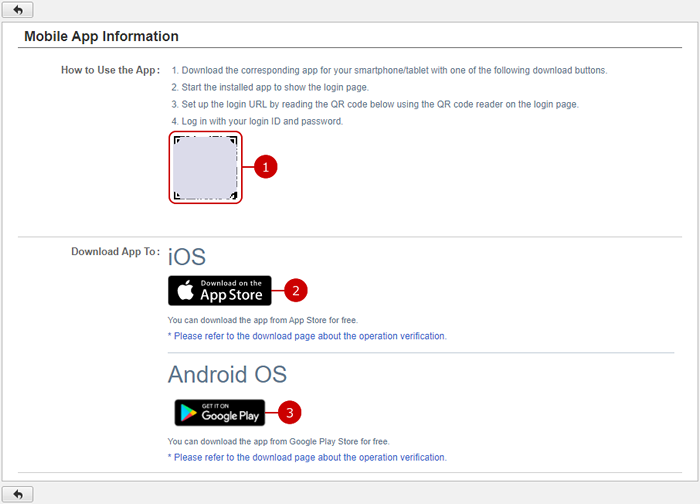
-
The 2D barcode helps users to set up the login URL.
-
The link opens the mobile app download page of App Store.
-
The link opens the mobile app download page of Google Play Store.
To Install Mobile App
- For iOS users,
read this section.
- For Android users,
read this section.
Install the mobile app on your iOS device.
-
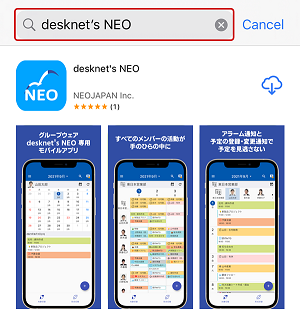
Launch App Store on your smartphone or tablet and search by "desknet's NEO."
-
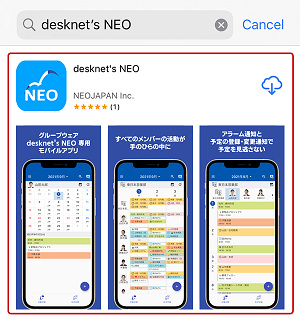
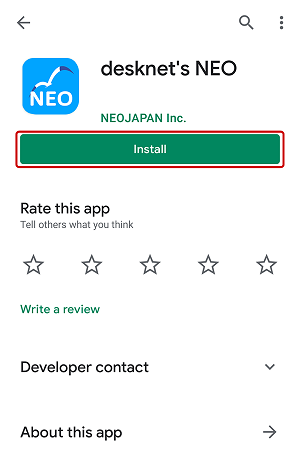
Select [desknet's NEO] from the list to open the app's details page.
-
Tap [Install] to start the installation.
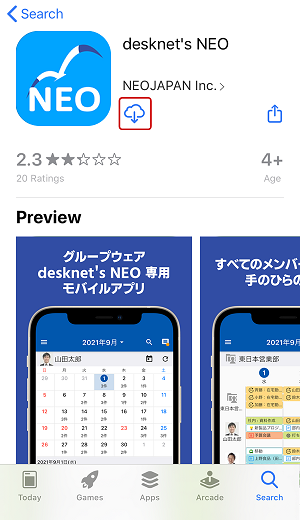
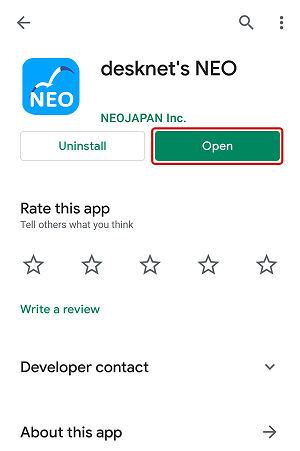
-
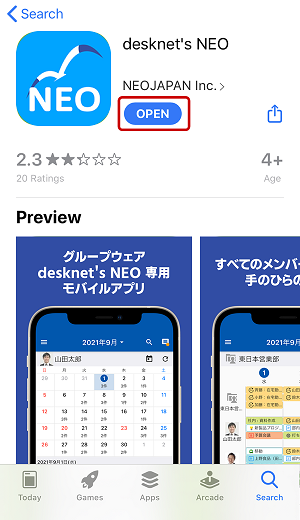
The installation is completed when [Open] shows on App Store.
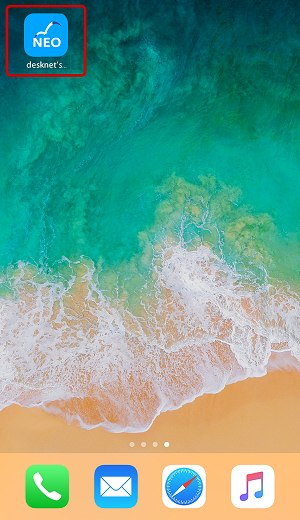
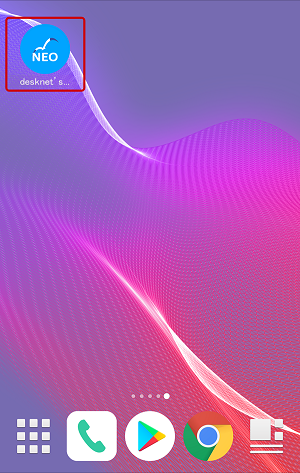
Now you have the desknet's NEO app icon on your device's home screen.
Install the mobile app on your Android device.
-
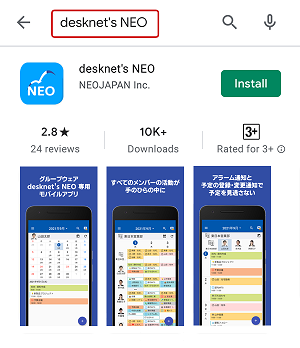
Launch Play Store on your smartphone or tablet and search by "desknet's NEO."
-
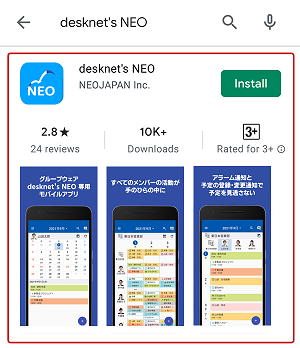
Select [desknet's NEO] from the list to open the app's details page.
-
Tap [Install] to start the installation.
-
The installation is completed when [Open] shows on Play Store.
Now you have the desknet's NEO app icon on your device's home screen.
To Log In To Mobile App
You need to log in to the mobile app before use.
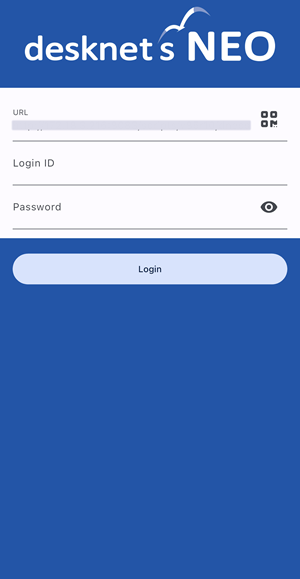
Log in with the URL, your login ID, and your password.
Enter URL.
Or you can read the URL by the way below.
-
Read the 2D barcode to enter the URL.
Read the 2D barcode to enter the URL.
To Receive Push Notification in Mobile App
You can receive push notification from desknet's NEO in the Mobile App.
■Supported applications
The following applications support push notifications.
-
Neotwi
-
Schedule
-
ToDo
-
WebMail
-
Whereabouts
-
Workflow
-
Circulation/Report
-
Information
-
Reminder
-
Safety Confirmation
■When you will receive push notifications
You will receive notifications at the following times.
Neotwi
-
When a tweet from another user is posted
-
When a direct message from another user is posted
Schedule
-
When an event from another user is added/updated/deleted
* You don't get notified when a event is added/updated/deleted by importing a CSV file.
ToDo
-
When a task from another user is added/updated
WebMail
-
When you automatically receive a new mail
* You get notified when you receive a new mail on a personal account.
* You don't get notified when a new mail gets delivered on a shared account.
* The following settings are required for WebMail push notifications.
-
Check the "Notification" checkbox of WebMail in [Neotwi > Personal Settings > Announcement Settings].
- Use the WebMail's automatic receive.
(For more information, please refer WebMail > To Setup Automatic Receive in User's Manual).
-
When a whereabouts from another user is added/updated
* Push notification will be made when a whereabout is created from the Whereabouts application.
Facility Reservation
-
When an event from another user is added/updated/deleted
Workflow
-
When you receive an application (When you are the current approver)
-
When your application gets returned (remanded)
-
When an application is approved to be raised after you in the Workflow Steps
-
When an application created by you gets denied
* You are not notified when an application gets returned from [System Management].
Circulation/Report
-
When a circular/report gets added/resent
* You are not notified when a comment is added to a circular/report.
Information
-
When an information gets delivered
-
When an information with a request for approval gets delivered
-
When the information you created with a request for approval gets declined
* If the start time of the display period is after the current time, you will not receive a push notification when the information is added/updated.
Reminder
-
When the reminder set in a Schedule event, Facility Reservation event and ToDo task notifies you
* The following settings are required for the Reminder Push Notifications.
-
Set email notification to "Use" in [Setup > Mail Server Settings].
-
Specify a mail address to receive mail notification in Profile's [Edit Profile].
-
When you receive an announcement
-
When you receive a safety confirmation
* If you logout with the "Logout" button from the Mobile App Account screen, you will stop receiving push notifications.
* It's required to launch the Scheduler for the following applications. Please consult with the administrator.
-
WebMail
-
Add/Edit Information
-
Reminder

![Click the [2D barcode] icon to start the camera](../images/pset/032.png)