Setting - single sign-on
desknet's NEO setting
In desknet's NEO setup menu add Chatluck as a single sign-on client
Setup>System Setting>Single Sign-On Setting.
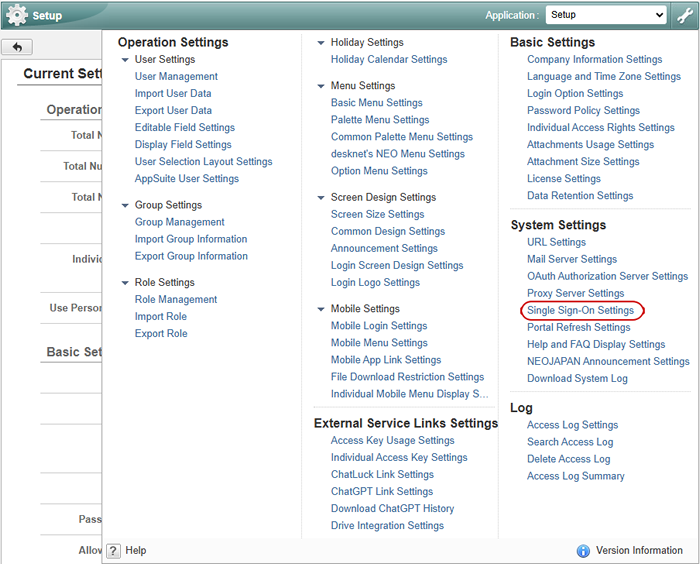
Single Sign-On screen will appear.
-
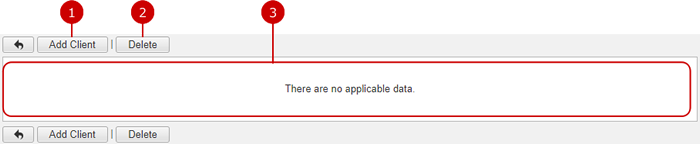
Display create client screen
-
Delete the selected client.
-
the List of the added clients client will appear
Add ChatLuck as a client By clicking [Add Client] button, Add client screen will appear.
-
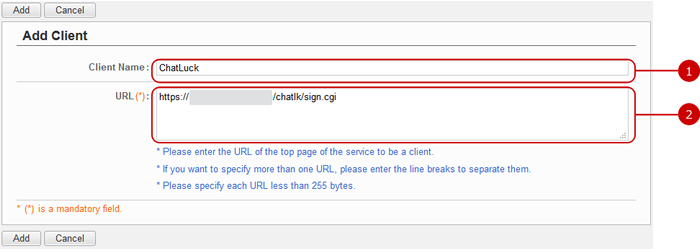
Enter Client Name.(we recommend entering easily recognized name like [ChatLuck] etc)
-
The URL to be entered here can be found in [System Administrator Settings > System Preference Setting > ChatLuck URL Setting] in ChatLuck. Please enter the same value.(please make sure that the setting is done in ChatLuck System administrator Settings)
Click “Add" button to add the data.
After adding, Single Single Sign-On setting screen will appear.

[Client ID]and[Client Secret]will be used later in ChatLuck setting. desknet's NEO setting is done.
ChatLuck setting
In ChatLuck System administrator Setting, enter desknet's NEO integration information.
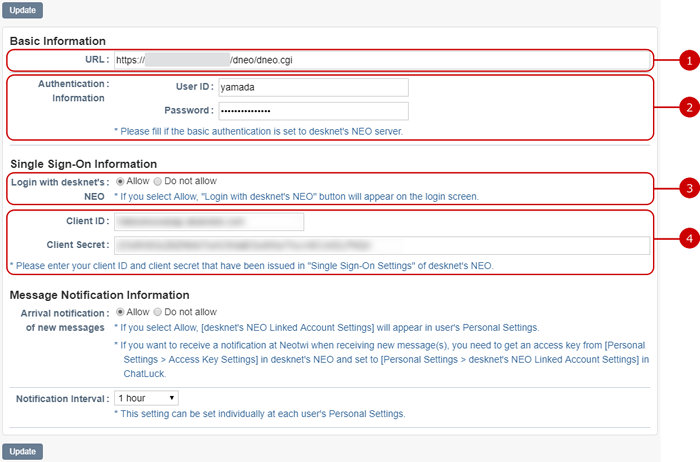
In System administrator setting, External Connection Settings > desknet's NEO Linked Account Settings will appear.
-
Enter desknet's NEO URL.
-
If authentication is set to the desknet's NEO server, enter the user ID and password.
-
Select [Allow].
-
Enter [Client ID]and[Client Secret] which was displayed when we added the client to desknet's NEO setting.
Click "Update" to save.
Importing desknet's NEO Groups to Chatluck
desknet's NEO setting
To export groups
In desknet's NEO clicking the setup>Operation Settings >Export Group information link will display Export group Information screen .
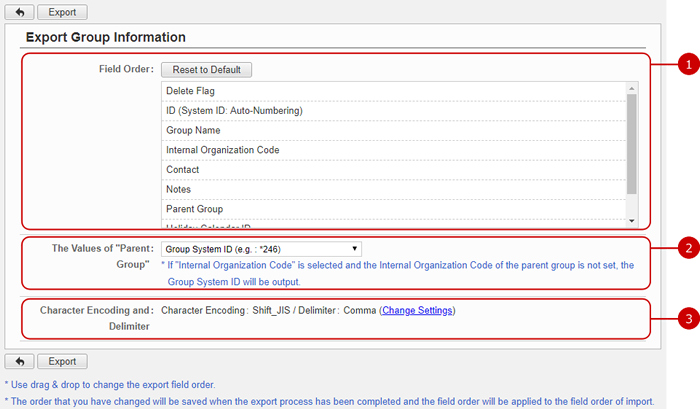
After all entries are completed, when you press "Export" button, group information will be downloaded as a CSV file.
Please open the downloaded CSV in Excel, and delete the [ID (System ID: Auto-Numbering)]column.
ChatLuck Setting
To export groups
In ChatLuck choose System administrator Settings,
to display group import screen click the Import link in Operation Managment> Group Management> Import link from the menu in the left side .
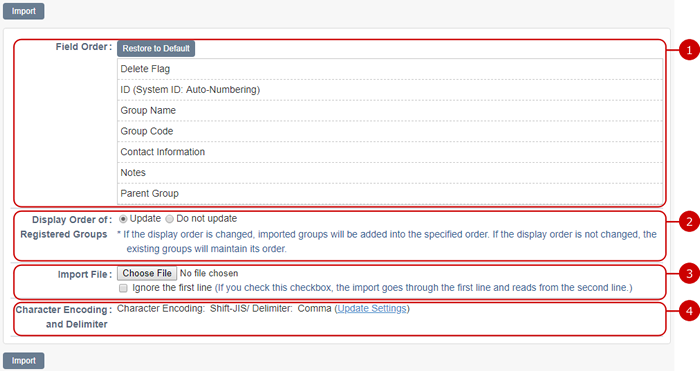
Clicking "Import" button after all entries have completed, will import desknet's NEO Groups to ChatLuck.
Calling ChatLuck from Palette menu.
desknet's NEO setting
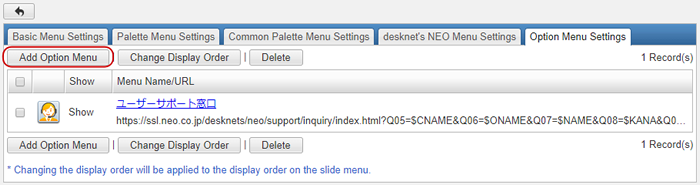
Clicking Setup> Operation Settings> Option Menu Settings, will display Option Menu Settings screen.
Press [Add Option Menu] button.
Add Option Menu screen will be displayed.
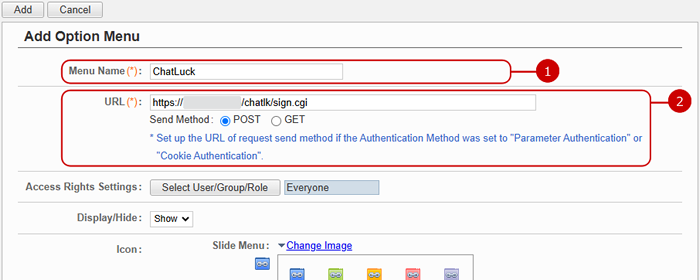
- Enter a menu name.(in Menu Name please enter an easily recognized name like ChatLuck etc)
- The URL to be entered here can be found in [System Administrator Settings > System Preference Setting > ChatLuck URL Setting] in ChatLuck. Please enter the same value.(please make sure that the setting is done in ChatLuck System Administrator Settings)
*Adding ?auto_sso=on paramter to the above URL, login will be performed from desknet's NEO side without displaying Chatluck login screen

*for setting Option Menu icon Please refer to admin>Operation Setting>Menu Settings > To Add Option Menu in system management manual.
Click "Update" button to save the changes.
Displaying the added option Menu in common Palette Menu. click the [Common Palette Menu Settings] tab.
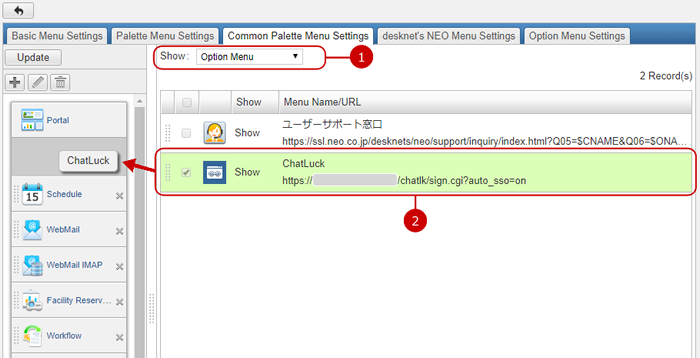
- Select the option menu.
- Add the ChatLuck Option Menu to Palette Menu using drag & drop.
Click "Update" to save.
ChatLuck will be displayed in desknet's NEO Palette Menu
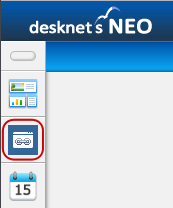
By clicking [ChatLuck]Option Menu, ChatLuck will be opened in a new window.
Copyright (C) NEOJAPAN Inc. All Rights Reserved.


